Showing posts with label pc tricks. Show all posts

Saturday, April 27, 2013

How To View Two Excel Sheets Side-By-Side

1 comment
Excels are the best way to maintain your records like count or any important task. In my work we always work on excels to maintain my records i.e how many games we tested etc. Similarly, like we tested around 100+ games, we have to make a correct count of each game. This not only includes correct count, but also the count of defects we logged and against which games and all. This becomes necessary to compare the data with different sheets. For this the best option is to open two different sheets side by side. But it becomes very troubling to maintain both the sheets.


 There in Office 2013, we have this feature in which you can view two different excel sheets side by side. Not all MS office provides this feature, but Office 2013 does.

Follow the steps below to view two excel sheets side by side
:

  •  Open the two sheets that you want to say, compare or view.
  •   Select any of the sheet and click on the View -> Arrange All.
  •   Then you will see a small window, select the option Tiled.
Note: You can also view them in horizontal manner. For that you need to select the Horizontal option
  •   You can also choose the option View Side By Side, if your choice is horizontal.
  •   If you choose the View Side By Side option, below it you will find the option, Synchronous Scrolling. Click on it, if you want to sync the scrolling.

This way you can compare any two excel sheets or view two different excel sheets side-by-side.
Note: Make sure that your files are saved.
Read More...

Tuesday, April 23, 2013

How to Create a ISO File - With Free ISO Creator Software

Leave a Comment
ISO files are very popular, especially for the distribution of CD/DVD on the internet, even Microsoft provide DVDs of Windows 7 and Windows 8 in the form of an ISO file which can be downloaded directly from the Microsoft website, then you can burn it to a DVD or USB Flash Drive.

Why ISO file?
If you want to backup a bootable CD or DVD to the HDD, you must create an ISO file. An ISO image file is an exact replica of a CD or DVD, and of course you can re-copy (burn) it to a CD or DVD, and generate an exactly same DVD and it will still bootable. Backup data from CD/DVD in the form of an ISO file is easier to manage and you can also open or extract the ISO file using Winrar or 7zip.

How to create an ISO file?
Here is how to create an ISO file using the smallest and easiest software available on the internet, and most importantly, this little software is free:

Step 1:
Download Free ISO Creator 308KB (Download) (Mirror)


Free ISO Creator is a free ISO image file creation tool, can help you to directly create an ISO CD-image (ISO 9660, also referred to as CDFS, Compact Disc File System) file from the DVD/CD-ROM or any folders on your PC. No complicated settings and options, this software is very easy to use.

This software is completely free, the iso-9660 standard iso format file can be used in Linux/UNIX platforms. This program run with all popular Windows operating systems, such as Windows XP, Windows Vista, Windows 7 and Windows 8, support both 32bits and 64bits platform.


Step 2:
Open this software > click Browse to select source folder or DVD-ROM drive > in the Volume Name type the input label of the ISO file > click Save as to set the output path and the ISO file name > click Create.
Read More...

Wednesday, April 10, 2013

Run NFS Most Wanted On Laptop In Full Screen

Leave a Comment
Need For Speed Most Wanted(NFSMW) is the most highly played game on PC. Each time you start the Career it makes you drive crazy. You wont leave the game until you finish defeating most of the Blacklisted.  When i started playing this, i almost skipped my lectures :) Anyways, i used to play on the desktop PC, but now while playing on the laptop with wide screen resolution of above 1024 x 768, the game displays blank spaces on the sides of the screen. For someone its ok playing the game like it is, but for some like me, likes to play it as if m playing it for real. The main reason for this is, the game was built much back and therefore it does not support the current resolutions that are now available for laptops.


Like for my laptop, the screen resolution is 1280 x 800 which is much higher for the game. Then my colleague, who also loves to play this game, came up with one solution. He found some launcher for the game, which forces the game to run in desired resolution. Believe me it works for real. you are able to play the game in full wide screen mode.


How does it works:

1. Download NFS Most Wanted Launcher from here.

2. Extract the rar file (nfsmwres.ini and nfsmw.exe) in the installed game directory.

3. Double click on nfsmw.exe, type in your screen resolution. Like for my screen i will type 1280 x 800.
To know your display resolution , right click on the desktop and click Screen Resolution.


4. Select the game version, as per your game, say demo/v1.2/v1.3. I will be going with v1.3

5. Click Launch to run the game.

Enjoy. Thanx to my friend for letting me know about this launcher.

Download NFS Most Wanted Launcher


You May Also Like:
Read More...

Tuesday, April 2, 2013

Top 10 Registry Hacks For Windows users

1 comment
Hello Friends, It is defined in every system and can do everything in your system if you go deep in it.Here i am going to describe top 10 registry tricks or can say hack which i have implemented on my system and feel very useful for any change and security of your system.Before keeping hands in registry if your regisrty is disabled first enable it.

1.Display legal notice on startup:

Wanna make your friends afraid by displaying about there secrets while Windows start? Well you can do it pretty easily by displaying a secret message about him at system start up.
Goto Start–>Run–>Regedit

[HKEY_LOCAL_MACHINE\SOFTWARE\Microsoft\Windows\CurrentVersion\policies\system]
"legalnoticecaption"="enter your notice caption"
"legalnoticetext”="enter your message text here"

2.Automatic Administrator Login:

We all know Windows Xp is not a secured OS as Linux.Well here’s the trick which you can use to prove that Windows XP is not at all secure as multi-user operating system. Hacking the system registry from any account having access to system registry puts you in to the administrator account.
Goto Start–>Run–>Regedit

[HKEY_LOCAL_MACHINE\SOFTWARE\Microsoft\Windows NT\CurrentVersion\Winlogon]
“AutoAdminLogon”=”1

3.Remove Shutdown Option:

Wanna play with your friends by removing the shutdown option from start menu in their computer.

Goto Start–>Run–>Regedit

HKEY_CURRENT_USER\Software\Microsoft\Windows\CurrentVersion\Explorer
“NoClose”=”DWORD:1

4.Speed Up Menu Display:

When using the Start menu then you will notice a delay between different tiers of the menu hierarchy. For the fastest computer experience possible I recommend changing this value to Zero. This will allow the difference tiers to appear instantly.
When using the Start menu then you will notice a delay between different tiers of the menu hierarchy. For the fastest computer experience possible I recommend changing this value to Zero. This will allow the difference tiers to appear instantly. Start –> Run (Windows + R) –>Regedit.

Navigate to HKEY_CURRENT_USER\Control Panel\Desktop

Select MenuShowDelay from the list on the right.

Right click on it and select Modify.

Change the value to 0.

Reboot your computer.

5.GPEDIT.MSC And Autoplay:

A great tweaking file that comes with XP is gpedit.msc.
  • Go to Start -> Run–>gpedit.msc and press enter.
  • It is effectively the Policies Editor, and it comes in handy often.
For example, if you hate CD autoplay and want to permanently disable it, you can use this tool to do so.
Just run gpedit.msc, then go to Computer Configuration –> Administrative Templates –> System.
In here you can see the value ‘Turn Off Autoplay’. Right-click on it and then click ‘Properties’.

6.Speeding Up Share Viewing:

 Basically, when you connect to another computer with Windows XP, it checks for any Scheduled tasks on that computer – a fairly useless task, but one that can add up to 30 seconds of waiting on the other end – not good! Fortunately, it’s fairly easy to disable this process.
  •  First, navigate to HKEY_LOCAL_MACHINE/Software/Microsoft/Windows/Current Version/Explorer/RemoteComputer/NameSpace in the Registry. 
  • Below that, there should be a key called {D6277990-4C6A-11CF-8D87-00AA0060F5BF}. Just delete this, and after a restart, Windows will no longer check for scheduled tasks – much performance improvement!

7.Increasing options in add/remove programs:

Not a fan of MSN Messenger? don’t want Windows Media Player on your system? Fair enough, but if you go to Add/Remove Programs in the Control Panel, by default none of Windows XP’s ‘built in’ programs are visible. it’s fairly easy to change, though… just open the file X:\Windows\inf\sysoc.inf (where X: is the drive letter where Windows XP is installed) in Notepad. You should see a section of the file something like this:

[Components]
NtComponents=ntoc.dll,NtOcSetupProc,,4
WBEM=ocgen.dll,OcEntry,wbemoc.inf,hide,7
Display=desk.cpl,DisplayOcSetupProc,,7
Fax=fxsocm.dll,FaxOcmSetupProc,fxsocm.inf,,7
NetOC=netoc.dll,NetOcSetupProc,netoc.inf,,7
iis=iis.dll,OcEntry,iis.inf,,7
com=comsetup.dll,OcEntry,comnt5.inf,hide,7
dtc=msdtcstp.dll,OcEntry,dtcnt5.inf,hide,7
IndexSrv_System = setupqry.dll,IndexSrv,setupqry.inf,,7
TerminalServer=TsOc.dll, HydraOc, TsOc.inf,hide,2
msmq=msmqocm.dll,MsmqOcm,msmqocm.inf,,6
ims=imsinsnt.dll,OcEntry,ims.inf,,7
fp_extensions=fp40ext.dll,FrontPage4Extensions,fp40ext.inf,,7
AutoUpdate=ocgen.dll,OcEntry,au.inf,hide,7
msmsgs=msgrocm.dll,OcEntry,msmsgs.inf,hide,7
RootAutoUpdate=ocgen.dll,OcEntry,rootau.inf,,7
IEAccess=ocgen.dll,OcEntry,ieaccess.inf,,7

This is a list of all components installed at the moment. I’ve taken the example of MSN Messenger – the program entry called ‘msmsgs’, third-last line. You can see the word ‘hide’ highlighted – this is the string which tells Windows not to display the component in the Add/Remove Programs list. Fix this up by simply deleting the word ‘hide’ like so:

msmsgs=msgrocm.dll,OcEntry,msmsgs.inf,hide,7

To this:

msmsgs=msgrocm.dll,OcEntry,msmsgs.inf,,7

Now, after restarting, you should be able to see MSN Messenger in the Add/Remove Programs list. If you want to be able to quickly view and remove all components, simply open the sysoc.inf file and do a global find and replace for the word “,hide” and replace it with a single comma “,”.

8.Automatically Kill Programs At Shutdown:

Do you get irrated seeing  message boxes telling you that a program is still running during Shutdown? Making it so that Windows automatically kills applications running is a snap.
Simply navigate to the HKEY_CURRENT_USER–>Control Panel–>Desktop directory in the Registry, then alter the key AutoEndTasks to the value 1.

9.Create a Shortcut to Lock Your Computer

You can double-click a shortcut on your desktop to quickly lock the keyboard and display without using CTRL+ALT+DEL or a screen saver.

To create a shortcut on your desktop to lock your computer:

1. Right-click the desktop.
2. Point to New, and then click Shortcut.
3. The Create Shortcut Wizard opens.

4. In the text box, type the following:
rundll32.exe user32.dll,LockWorkStation
5. Click Next.
6. Enter a name for the shortcut. You can call it “Lock Your Pc” or choose any name you like.
7. Click Finish.

To change the icon:

8. Right click the shortcut and then select Properties.
9. Click the Shortcut tab, and then click the Change Icon button.
10. In the Look for icons in this file text box, type:
Shell32.dll
11. Click OK.
12. Select one of the icons from the list and then click OK.
13. You could also give it a shortcut keystroke such CTRL+ALT+L. This would save you only one keystroke from the normal command, but it could be more convenient.

10.How To Enable Or Disable USB Pendrive Access

Usually Pendrive access is restricted in Colleges and Offices due to Virus Problems.Worms Spread across the Computers in Organisations and causes trouble to System Administrator.So some of the administrator blocks the USB ports so that system does not get infected by this way.You can also disable and re-enable your system’s USB ports by a simple Registry trick

To disable the access to USB port, in windows XP and 2000:

1. Click Start–>Run.
2. Type regedit, and then click OK.
3. Locate, and then click the following registry key:
     HKEY_LOCAL_MACHINE\SYSTEM\CurrentControlSet\Services\UsbStor
4. In the right pane, double-click Start.
5. In the Value data box, type 4, click Hexadecimal (if it is not already selected), and then click Ok.
6. Quit Registry Editor.

To re-enable a disabled port:

1. Click Start–>Run.
2. Type regedit, and then click OK.
3. Locate, and then click the following registry key:
    HKEY_LOCAL_MACHINE\SYSTEM\CurrentControlSet\Services\UsbStor
4. In the right pane, double-click Start.
5. In the Value data box, type 3, click Hexadecimal (if it is not already selected), and then click Ok.
6. Quit Registry Editor.
You May Also Like:
Read More...

Monday, April 1, 2013

Merge and Hide a Compressed File (Zip or Rar) into a Picture

Leave a Comment
OFcourse... All of us have many secret files (secret picture, secret movie, etc)

We must hide those files...
blogger-emoticon.blogspot.com
it's simple, we can hide a compressed file (rar/zip) into a image file (jpg)...


+
=


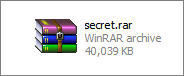
 For example I have two files, secret.rar and rose.jpg are located in C:\. To hide secret.rar you must merge it with rose.jpg. To do so follow the below steps:-

 Steps
  • Open command prompt, click Start > Run > type cmd then click OK

  • Type cd\

  • Type copy /b rose.jpg + secret.rar secret_rose.jpg

  • Press Enter, it will create secret_rose.jpg file


when someone open secret_rose.jpg, it will open up rose.jpg inside secret_rose.jpg


To open compressed file inside secret_rose.jpg simply rename it to secret_rose.rar 


You May Also Like:


+

=
For example I have two files, secret.rar and rose.jpg and located in C:\
to hide secret.rar you must merge it with rose.jpg1. Open command prompt, click Start > Run... > type cmd then click OK


2. type cd\


3. type copy /b rose.jpg + secret.rar secret_rose.jpg

4. press Enter, it will create secret_rose.jpg file


when someone open secret_rose.jpg, it will open up rose.jpg inside secret_rose.jpg


to open compressed file inside secret_rose.jpg simply rename it to secret_rose.rarblogger-emoticon.blogspot.com - See more at: http://www.komku.org/search/label/Other#sthash.BF9UhShF.dpuf


+

=
For example I have two files, secret.rar and rose.jpg and located in C:\
to hide secret.rar you must merge it with rose.jpg1. Open command prompt, click Start > Run... > type cmd then click OK


2. type cd\


3. type copy /b rose.jpg + secret.rar secret_rose.jpg

4. press Enter, it will create secret_rose.jpg file


when someone open secret_rose.jpg, it will open up rose.jpg inside secret_rose.jpg


to open compressed file inside secret_rose.jpg simply rename it to secret_rose.rarblogger-emoticon.blogspot.com - See more at: http://www.komku.org/search/label/Other#sthash.BF9UhShF.dpuf


+

=
For example I have two files, secret.rar and rose.jpg and located in C:\
to hide secret.rar you must merge it with rose.jpg1. Open command prompt, click Start > Run... > type cmd then click OK


2. type cd\


3. type copy /b rose.jpg + secret.rar secret_rose.jpg

4. press Enter, it will create secret_rose.jpg file


when someone open secret_rose.jpg, it will open up rose.jpg inside secret_rose.jpg


to open compressed file inside secret_rose.jpg simply rename it to secret_rose.rarblogger-emoticon.blogspot.com - See more at: http://www.komku.org/search/label/Other#sthash.BF9UhShF.dpuf


+

=
For example I have two files, secret.rar and rose.jpg and located in C:\
to hide secret.rar you must merge it with rose.jpg1. Open command prompt, click Start > Run... > type cmd then click OK


2. type cd\


3. type copy /b rose.jpg + secret.rar secret_rose.jpg

4. press Enter, it will create secret_rose.jpg file


when someone open secret_rose.jpg, it will open up rose.jpg inside secret_rose.jpg


to open compressed file inside secret_rose.jpg simply rename it to secret_rose.rarblogger-emoticon.blogspot.com - See more at: http://www.komku.org/search/label/Other#sthash.BF9UhShF.dpuf


+

=
For example I have two files, secret.rar and rose.jpg and located in C:\
to hide secret.rar you must merge it with rose.jpg1. Open command prompt, click Start > Run... > type cmd then click OK


2. type cd\


3. type copy /b rose.jpg + secret.rar secret_rose.jpg

4. press Enter, it will create secret_rose.jpg file


when someone open secret_rose.jpg, it will open up rose.jpg inside secret_rose.jpg


to open compressed file inside secret_rose.jpg simply rename it to secret_rose.rarblogger-emoticon.blogspot.com - See more at: http://www.komku.org/search/label/Other#sthash.BF9UhShF.dpuf


+

=
For example I have two files, secret.rar and rose.jpg and located in C:\
to hide secret.rar you must merge it with rose.jpg1. Open command prompt, click Start > Run... > type cmd then click OK


2. type cd\


3. type copy /b rose.jpg + secret.rar secret_rose.jpg

4. press Enter, it will create secret_rose.jpg file


when someone open secret_rose.jpg, it will open up rose.jpg inside secret_rose.jpg


to open compressed file inside secret_rose.jpg simply rename it to secret_rose.rarblogger-emoticon.blogspot.com - See more at: http://www.komku.org/search/label/Other#sthash.BF9UhShF.dpuf


+

=
For example I have two files, secret.rar and rose.jpg and located in C:\
to hide secret.rar you must merge it with rose.jpg1. Open command prompt, click Start > Run... > type cmd then click OK


2. type cd\


3. type copy /b rose.jpg + secret.rar secret_rose.jpg

4. press Enter, it will create secret_rose.jpg file


when someone open secret_rose.jpg, it will open up rose.jpg inside secret_rose.jpg


to open compressed file inside secret_rose.jpg simply rename it to secret_rose.rarblogger-emoticon.blogspot.com - See more at: http://www.komku.org/search/label/Other#sthash.BF9UhShF.dpuf


+

=
For example I have two files, secret.rar and rose.jpg and located in C:\
to hide secret.rar you must merge it with rose.jpg1. Open command prompt, click Start > Run... > type cmd then click OK


2. type cd\


3. type copy /b rose.jpg + secret.rar secret_rose.jpg

4. press Enter, it will create secret_rose.jpg file


when someone open secret_rose.jpg, it will open up rose.jpg inside secret_rose.jpg


to open compressed file inside secret_rose.jpg simply rename it to secret_rose.rarblogger-emoticon.blogspot.com - See more at: http://www.komku.org/search/label/Other#sthash.BF9UhShF.dpuf


+

=
For example I have two files, secret.rar and rose.jpg and located in C:\
to hide secret.rar you must merge it with rose.jpg1. Open command prompt, click Start > Run... > type cmd then click OK


2. type cd\


3. type copy /b rose.jpg + secret.rar secret_rose.jpg

4. press Enter, it will create secret_rose.jpg file


when someone open secret_rose.jpg, it will open up rose.jpg inside secret_rose.jpg


to open compressed file inside secret_rose.jpg simply rename it to secret_rose.rarblogger-emoticon.blogspot.com - See more at: http://www.komku.org/search/label/Other#sthash.BF9UhShF.dpuf


+

=
For example I have two files, secret.rar and rose.jpg and located in C:\
to hide secret.rar you must merge it with rose.jpg1. Open command prompt, click Start > Run... > type cmd then click OK


2. type cd\


3. type copy /b rose.jpg + secret.rar secret_rose.jpg

4. press Enter, it will create secret_rose.jpg file


when someone open secret_rose.jpg, it will open up rose.jpg inside secret_rose.jpg


to open compressed file inside secret_rose.jpg simply rename it to secret_rose.rarblogger-emoticon.blogspot.com - See more at: http://www.komku.org/search/label/Other#sthash.BF9UhShF.dpuf


+

=
For example I have two files, secret.rar and rose.jpg and located in C:\
to hide secret.rar you must merge it with rose.jpg1. Open command prompt, click Start > Run... > type cmd then click OK


2. type cd\


3. type copy /b rose.jpg + secret.rar secret_rose.jpg

4. press Enter, it will create secret_rose.jpg file


when someone open secret_rose.jpg, it will open up rose.jpg inside secret_rose.jpg


to open compressed file inside secret_rose.jpg simply rename it to secret_rose.rarblogger-emoticon.blogspot.com - See more at: http://www.komku.org/search/label/Other#sthash.BF9UhShF.dpuf


+

=
For example I have two files, secret.rar and rose.jpg and located in C:\
to hide secret.rar you must merge it with rose.jpg1. Open command prompt, click Start > Run... > type cmd then click OK


2. type cd\


3. type copy /b rose.jpg + secret.rar secret_rose.jpg

4. press Enter, it will create secret_rose.jpg file


when someone open secret_rose.jpg, it will open up rose.jpg inside secret_rose.jpg


to open compressed file inside secret_rose.jpg simply rename it to secret_rose.rarblogger-emoticon.blogspot.com - See more at: http://www.komku.org/search/label/Other#sthash.BF9UhShF.dpuf


+

=
For example I have two files, secret.rar and rose.jpg and located in C:\
to hide secret.rar you must merge it with rose.jpg1. Open command prompt, click Start > Run... > type cmd then click OK


2. type cd\


3. type copy /b rose.jpg + secret.rar secret_rose.jpg

4. press Enter, it will create secret_rose.jpg file


when someone open secret_rose.jpg, it will open up rose.jpg inside secret_rose.jpg


to open compressed file inside secret_rose.jpg simply rename it to secret_rose.rarblogger-emoticon.blogspot.com - See more at: http://www.komku.org/search/label/Other#sthash.BF9UhShF.dpuf


+

=
For example I have two files, secret.rar and rose.jpg and located in C:\
to hide secret.rar you must merge it with rose.jpg1. Open command prompt, click Start > Run... > type cmd then click OK


2. type cd\


3. type copy /b rose.jpg + secret.rar secret_rose.jpg

4. press Enter, it will create secret_rose.jpg file


when someone open secret_rose.jpg, it will open up rose.jpg inside secret_rose.jpg


to open compressed file inside secret_rose.jpg simply rename it to secret_rose.rarblogger-emoticon.blogspot.com - See more at: http://www.komku.org/search/label/Other#sthash.BF9UhShF.dpuf


+

=
For example I have two files, secret.rar and rose.jpg and located in C:\
to hide secret.rar you must merge it with rose.jpg1. Open command prompt, click Start > Run... > type cmd then click OK


2. type cd\


3. type copy /b rose.jpg + secret.rar secret_rose.jpg

4. press Enter, it will create secret_rose.jpg file


when someone open secret_rose.jpg, it will open up rose.jpg inside secret_rose.jpg


to open compressed file inside secret_rose.jpg simply rename it to secret_rose.rarblogger-emoticon.blogspot.com - See more at: http://www.komku.org/search/label/Other#sthash.BF9UhShF.dpuf


+

=
For example I have two files, secret.rar and rose.jpg and located in C:\
to hide secret.rar you must merge it with rose.jpg1. Open command prompt, click Start > Run... > type cmd then click OK


2. type cd\


3. type copy /b rose.jpg + secret.rar secret_rose.jpg

4. press Enter, it will create secret_rose.jpg file


when someone open secret_rose.jpg, it will open up rose.jpg inside secret_rose.jpg


to open compressed file inside secret_rose.jpg simply rename it to secret_rose.rarblogger-emoticon.blogspot.com - See more at: http://www.komku.org/search/label/Other#sthash.BF9UhShF.dpuf


+

=
For example I have two files, secret.rar and rose.jpg and located in C:\
to hide secret.rar you must merge it with rose.jpg1. Open command prompt, click Start > Run... > type cmd then click OK


2. type cd\


3. type copy /b rose.jpg + secret.rar secret_rose.jpg

4. press Enter, it will create secret_rose.jpg file


when someone open secret_rose.jpg, it will open up rose.jpg inside secret_rose.jpg


to open compressed file inside secret_rose.jpg simply rename it to secret_rose.rarblogger-emoticon.blogspot.com - See more at: http://www.komku.org/search/label/Other#sthash.BF9UhShF.dpuf


+

=
For example I have two files, secret.rar and rose.jpg and located in C:\
to hide secret.rar you must merge it with rose.jpg1. Open command prompt, click Start > Run... > type cmd then click OK


2. type cd\


3. type copy /b rose.jpg + secret.rar secret_rose.jpg

4. press Enter, it will create secret_rose.jpg file


when someone open secret_rose.jpg, it will open up rose.jpg inside secret_rose.jpg


to open compressed file inside secret_rose.jpg simply rename it to secret_rose.rarblogger-emoticon.blogspot.com - See more at: http://www.komku.org/search/label/Other#sthash.BF9UhShF.dpuf
Read More...